Saturday, October 23, 2010

The Future of Our World

If you think the Universe is big, then just check out this timeline.

Our Universe in Perspective

Watch RealD 3D Movies On Your Computer

Do you have a collection of those RealD glasses from watching those 3D movies at the cinema. Now you can use them to watch movies in 3D on a standard computer/laptop monitor. For this all you need is a computer running windows, the glasses, and any movie file.

Now click this link to download a free stereoscopic 3d player. Install it and watch your video wearing your glasses. Enjoy.

Wednesday, October 6, 2010

Remove Lyrics in a Song Using Audacity in 4 Simple Steps

Grab Audacity from their website here. Audacity is a great free program that lets you edit audio files. Once it's downloaded and installed, run the program and open up the song you want to modify. Make sure the song is in stereo not mono, and that it's in the highest quality you can find.


The audio file will be joined so the first thing you need to do is select from the pictured drop-down list "split stereo track". This will give you a left and right audio track.


Now highlight the right track. Make sure you only select that one track. You can do this by dragging the cursor over the waveform. The whole track needs to be selected.


With the right track selected, from the top effect menu now select "inverse".


Now back to the drop-down list for the audio tracks. Click it again and choose "mono". Do this for both left and right audio tracks.

That's it, you're now done. You can play the audio from Audacity or export it from the file menu. What's happening is by inversing the audio of right audio track anything that has the same sound in the left audio track will be canceled out and become silent. Left and right audio tracks are mostly different, except for the lyrics which should be the same in both. This isn't 100% so results will vary. Try it on several different songs to check out the results for yourself.

Monday, October 4, 2010

RISE FROM YOUR GRAVE: the cadbury egg cake

An oldie, but a goody.
Experiment:
Replace ordinary eggs in cake recipe with Cadbury Creme Eggs and observe results.

Hypothesis:
THIS IS GOING TO BE SO AWESOME

 Ingredients.
 This method does not work so well. You kind of have to just pull the eggs apart.
 I took this picture after waiting about 10 seconds for something to happen. Cadbury eggs are a little yolk-shy. I am learning that basically, you just need to forget everything you THINK know about eggs because man, you don't know anything. You know nothing about eggs. Eggs is like "You don't know me! Don't even play like you know me!" 
But there are still ways... 
 And here we have our Cadbury Egg Yolk 
And here we have our leftover Cadbury Egg shells. 
So we throw them the fuck out!
... because this is a CAKE, people. A CAKE. Cakes don't have shells! That would be RIDICULOUS! A cake with shells? You're like a crazy person! 
 I had to microwave the yolk to reduce the viscosity enough to get it back out of the cup and into the mixing bowl. Mainly I'm telling you this because it permits me to use the word "viscosity" and I never get to do that. 
 The batter was sort of like glue after mixing it all together. 
 I was frankly surprised that the batter in the pans rose at all, but when I took them back out of the oven, they sort of deflated. 
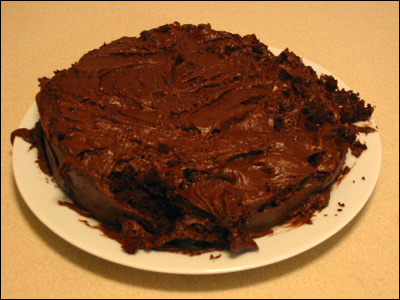
Later I tried to ice the cake, but it had some serious structural integrity issues and little cake pieces kept coming off onto the knife. I ended up using a can and a half of icing to avoid seriously damaging the cake. 
And here she be. She's a mess. 
 I tried a piece. I use the term "piece" losely. For some reason, this cake tastes vaguely like Novocaine? I don't know what that's about. 

CONCLUSION:
OKAY, FINE -- WHATEVER. Fuck you. Cadbury Egg cake is somewhat less awesome than the experimenter had hoped. But that's SCIENCE, people. Science! You experiment and you publish the results. Good or bad, right or wrong -- we're all better for it. The experimenter will also note that, upon excitedly telling a number of people of his cadbury egg cake idea, he met up with some degree of skepticism from friends and associates. He was told that the results would not only be poor, but a waste of time. 

To these people, I say: The Cadbury Egg Cake is a lot like LIFE:
Even though you realize it's probably not going to turn out the way you want it to, you do it anyway just to see how fucked up it's actually going to get.

Sunday, October 3, 2010

Getting The Windows Vista/Seven Snipping Tool Equivalent in Ubuntu

One feature I sorely miss when using linux is the snipping tool, which makes taking a snapshot of a piece of your desktop a breeze.

By default, there's no equivalent to this tool built-in by default and there's no real dedicated application available that does this either. There is a neat little trick that replicates this function and you may already have most of the software installed on your Ubuntu machine.


Using Ubuntu Software Center (or synaptic package manager) make sure you have these packages installed related to Compiz. What these do if you don't already know is enable some special effects for your desktop.

You can also go ahead and install "Kolourpaint", which is a cool MSPaint clone for linux.


Now go to:
System->Preferences->CompizConfig Settings Manager

In the left panel click "Extras" and in the right panel click the word "Screenshot".
Under "Use This Plugin" check off "Enable Screenshot" and under "Launch Application" type "Kolourpaint". That's it, you can close the window now.

To use it, all you have to do it press and hold the window key while you drag a box around what you want to capture. The image will be automatically saved to your desktop, and Kolourpaint will open it up immediately. If you don't want Kolourpaint to open then just omit it from the steps above. Enjoy!

Saturday, October 2, 2010

Install Windows XP to a USB Thumb Drive in 5 Easy Steps

In Microsoft's own words, it is impossible to install Windows XP on anything other than a hard drive. This is simply not true. By modifying a few files located on the Windows XP install disc you can!

Before you begin you need a few things: THIS FILE, an iso image of Windows XP Pro (works with SP3 and should work with SP2, other versions i'm not so sure), an iso editor such as WinISO/MagicISO/etc., and a USB stick formatted to fat/fat32 with enough space (maybe 2 gigabytes).


Step 1 - Using WinISO or another iso editor, open your Windows XP image  (SP3 preferably) and navigate to the I386 folder.

Step 2 - Delete the following files: 
   # DOSNET.INF
   # TXTSETUP.SIF
   # USB.IN_
   # USBPORT.IN_
   # USBSTOR.IN_ 

Step 3 - Add the following files from the above zip back in to the same directory:
   * USBBOOT.INF
   * DOSNET.INF
   * TXTSETUP.SIF
   * USB.IN_
   * USBPORT.IN_
   * USBSTOR.IN_

Step 4 - Save the iso, close the program and burn the iso to a cd.
Step 5 - Disconnect all internal hard drives, plug in a fat/fat32 formatted USB stick, power on the system, put the cd in and install to it. The USB stick should be visible now.

That's it. Plug your internal drives back in and in your computers bios set the first boot device to USB. Now whenever you plug in the stick before turning on your computer you'll boot into XP instead. Remember the USB interface is slow so the install will take some time. Even when you're done, booting into XP will be slow as well. If you use the stick on another computer, you may get a blue screen so booting into safe mode (press f8 at boot) would be advisable.

Friday, October 1, 2010

How to Use Flesh-mesh X-ray in Photoshop


Photoshop isn't magic but it has come a long way since since version 6.01. Most people know about the standard X-ray Photoshop techniques using the curves, levels and burn features, but are not aware of the many other features that are available in the latest version of Photoshop. Using these advanced features you can enhance an image at the level of the pixel and 60% of the time reveal more than the naked eye can see. Here's how.
Step 1
Open the image and use the pen tool to select only the area you want to reveal.


Step 2
Go to the Channel Mixer (Image>Adjustments) & select Infrared. Set the constant to -55.5%.
Step 3
Go to Exposure (Image>Adjustments) and take it up to +5.88). It should roughly look like the image to the left now.


Step 4
Go to the High Pass (Filter>Other) and bump it up to about 80. This is where the flesh will shine through.
Step 5
Now apply a Gaussian Blur to the area to even it out. Up the contrast too until it looks smooth.
Step 6
Finally, use the Levels tool to get the nipples (or other details) to stand out more.
This technique should work on most Photoshops after 6.01 and it should work 60% of the time

Thursday, September 30, 2010

Awesome & Simple Blood Tutorial for Photoshop

Get your source image
Open up the image in Adobe Photoshop that you want to turn into a bloody mess. We'll use this image to simulate a tiger attack. 


Step 1: Prepare the source image.
This isn't really necessary, but in this example we'll be removing the man to make room for the bloody wall. 

Since this step is purely optional I won't explain how for now (maybe in a future tutorial). For those of you familiar with Photoshop already you could use the clone tool or if you're using CS5 there's a new content-aware fill feature which will do this for you automagically.
 

Step 2: Find a bloody image.
Find a photo with a high contrast "splatter" pattern in it. Deep red on a white background works best. I started with a Google Image Search for the term "bloody". I find it helps to set Size to "Very Large" as it's important to work in the highest resolution possible. This poster from the anime/mangs Akira is exactly what we're looking for.


Step 3: Desaturate and turn up the contrast.
We don't need any of the color information in this image, so desaturate it (Image » Adjustments » Desaturate or Shift+Ctrl+U). Next we'll change the contrast of the image using Levels (Image » Adustments » Levels or Ctrl+L). The goal here is to make the wall completely white, and make the blood splatters mostly black with some gray in the detail areas. You'll need to drag the white arrow almost to the middle of the histogram. This will blowout the wall completely.


 Step 4: Add a Blood Layer.
Make a nice random selection with the lasso tool to isolate a good chunk of splatter. You'll probably want to avoid selecting the writing in blood, unless you mean to suggest that the tiger is Japanese and knows Kanji. Copy and paste it into a new layer on the original image. You power users know how to ctrl+drag selections across images, so feel free to do it that way.
Step 5: Set Blending to "Multiply".
There's a pull-down on the layers palette that sets the blending mode for that layer. If you're not familiar with how this works, you're missing out on one of the most powerful tools in the application. Set the blood layer to multiply.


Step 6: Transform and Shape.
Use the Free Transform tool (Edit » Free Transform or Ctrl+T) to make the blood match the surface upon which it is splattered. Ctrl+Drag the control corners to create perspective. Matching the perspective of the surface will really help sell the illusion. If necessary, you might even want to add a layer mask at this point to mask out foreground objects or to customize the blood splatter pattern to your liking.
 

Step 7: Colorize the blood layer.
Bring up the Hue/Saturation dialog (Image » Adjustments » Hue/Saturation or Ctrl+U). The idea here is to make the blood look red, but not too red. In real life, the blood would probably stain dark brown, but that just wouldn't be funny. Check "Colorize". Keep the Hue slider on "0", but adjust the Saturation and Lightness to fit your personal taste. I like to turn the lightness up enough so the details of the wall texture still peek through the blood stain.
 
Step 8: Rinse and Repeat.
Keep pasting in blood layers, but be sure to copy different source images or different parts of the original blood splatter image. We don't want the same splatter pattern to be visible on more than one surface. After you're done with the blood splatters, you might want to add shreds of clothing or body parts at your discretion. I think it's that sort of attention to detail that can make a good Photoshop great.